How to upload and trace using custom imagery.
Users have the ability to upload JPEG or PNG files to use as custom base imagery which they can then use to trace instead of the default Google aerial imagery.
First, create your project following the normal method. This article covers that process if you need a refresher.
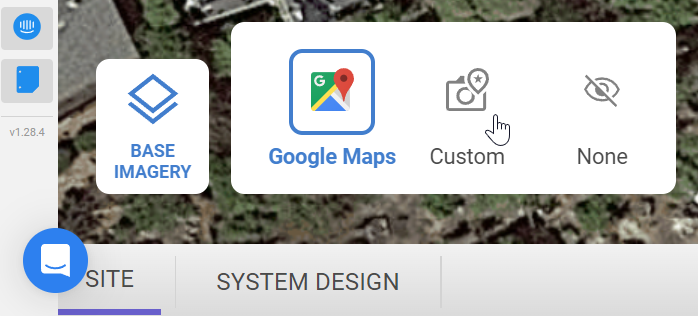
Open the Base Imagery menu in the bottom left of the canvas.
Lyra supports 3 base imagery options. Google Maps is the default, None is a blank white canvas, and Custom allows you to upload a replacement image. Click on the Custom area.
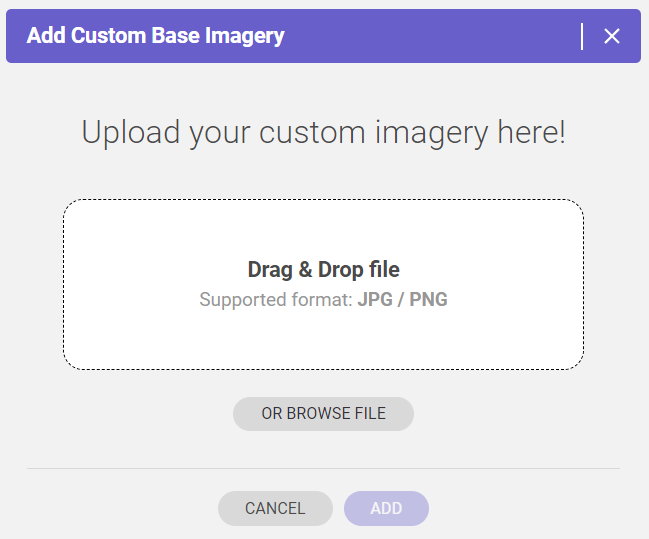
To upload the imagery you can drag and drop the file or browse to find it on your computer. After selecting it, click Add in the bottom right.
The app will now superimpose the uploaded image over the canvas and we can see 3 new tools to use: Position, Rotate & Scale, and Opacity.
-
Trace to Define Scale - Allows users to trace a particular portion of the uploaded image which then scales the entire uploaded image to match the scale defined by the trace. This is the most efficient and accurate method to scale uploaded imagery. Users will still need to position the image in the correct space.
-
Position - Allows users to move the new image into place without affecting the scale or size of the uploaded image. With the Select tool equipped, simply click on the uploaded image and drag into place.
-
Rotate & Scale - Allows users to change the uploaded image to match how the structure exists. Users edit by using any of the 4 arrows in the corners of the uploaded image.
-
Opacity - Allows users to adjust the transparency of the uploaded image to better see and match the original imagery that is beneath it. To increase or decrease the opacity of the uploaded image use the +/- in the Image Opacity banner in the upper middle area of the canvas.
Recommended workflow when manually scaling
The recommended method of scaling is to use the Trace to Define Scale method, although, users can manually scale by using the other tools. This is the recommended workflow for that strategy.
-
Reduce the opacity until the lower image can be seen through the uploaded image.
-
Position the uploaded image of the structure roughly in the center of the structure in the original imagery.
-
Use the Rotate and Scale arrows to adjust the image accordingly so that it matches the size of the structure in the original imagery.
-
Repeat the above steps as necessary. It sometimes helps to focus on a corner or area of the structure that's easiest to see.
-
When finished, click on the Apply Changes button on the bottom right to save.
-
You can then continue with your project as normal by tracing the roof outline, explained here.


