How to use Lyra's Smart Guides to make tracings easier and more accurate
Sometimes it can be difficult to accurately trace over aerial imagery. Rooftops may have complex geometry that must be taken into account to ensure that the quantity and placement of modules reflect real-world conditions. Smart Guides are here to help by suggesting point placement guidelines to make tracing faster and more accurate.
Enabling and disabling Smart Guides
We can enable or disable specific Smart Guides in two different ways:
-
With hotkeys (explained at the top of each section below)
-
By clicking on the smart guides icon at the top of the screen.

Parallel Lines

Hotkey: P
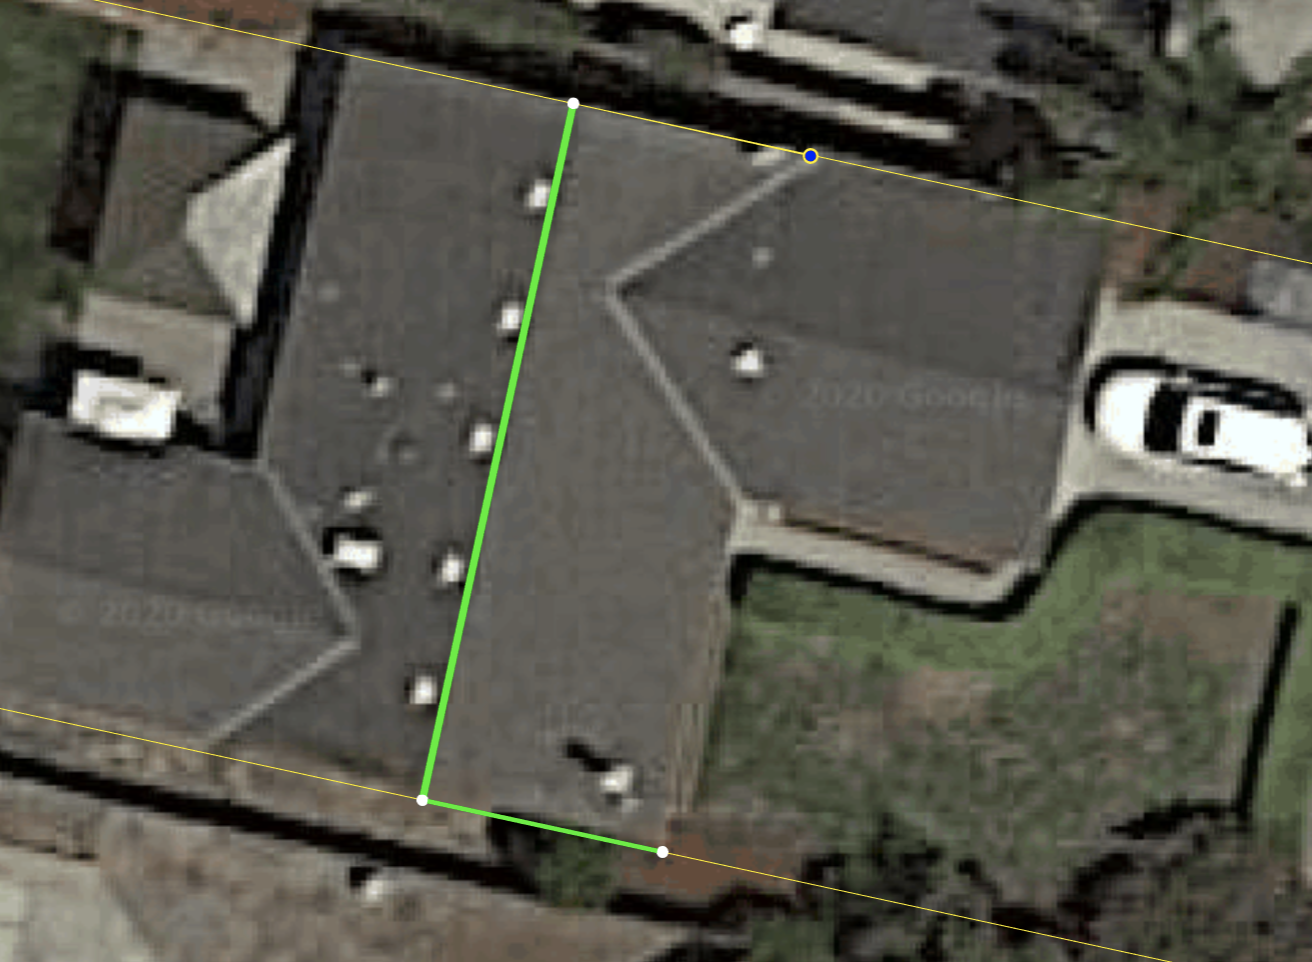
The Parallel Lines Smart Guide can help draw rakes on opposite sides of a roof in line with each other. In the following example we can see that Parallel Smart Guide’s suggested point (faint yellow line) would be parallel with the opposite rake.
Midpoint Lines

Hotkey: M
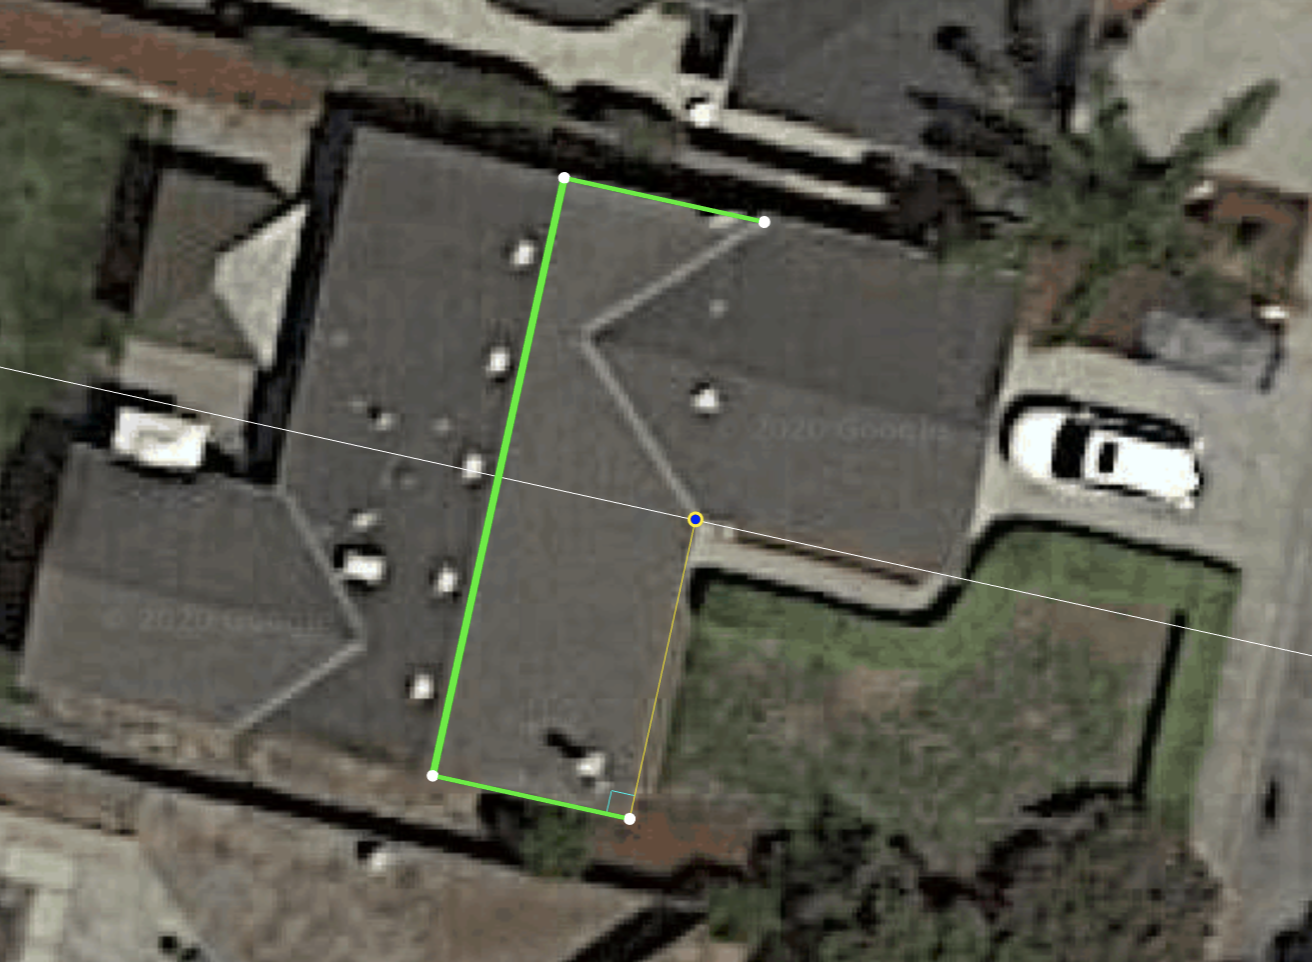
The Midpoint Lines Smart Guide can help specify a point halfway between previously specified lines. In the following example notice that the gable is in the center of a previously drawn ridge line.
Extension Lines

Hotkey: E
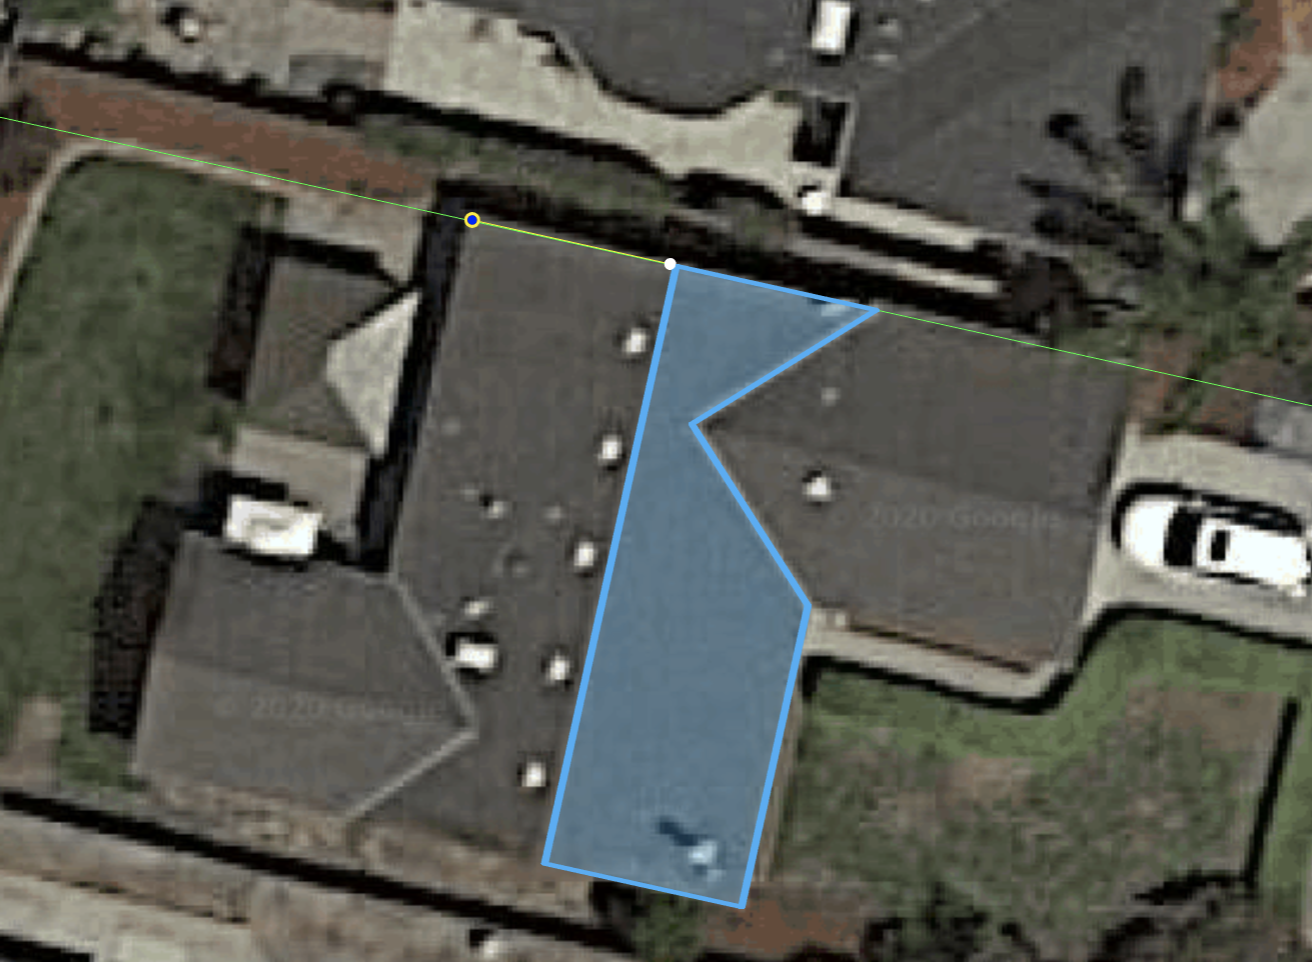
The Extension Lines Smart Guide can help specify a point that’s lengthened beyond, but still in line with, a previously drawn point. In this example, the Extension Lines Smart Guide (faint green line) are piggybacking off of the rake of an existing roof face.
Perpendicular Alignment

Hotkey: R
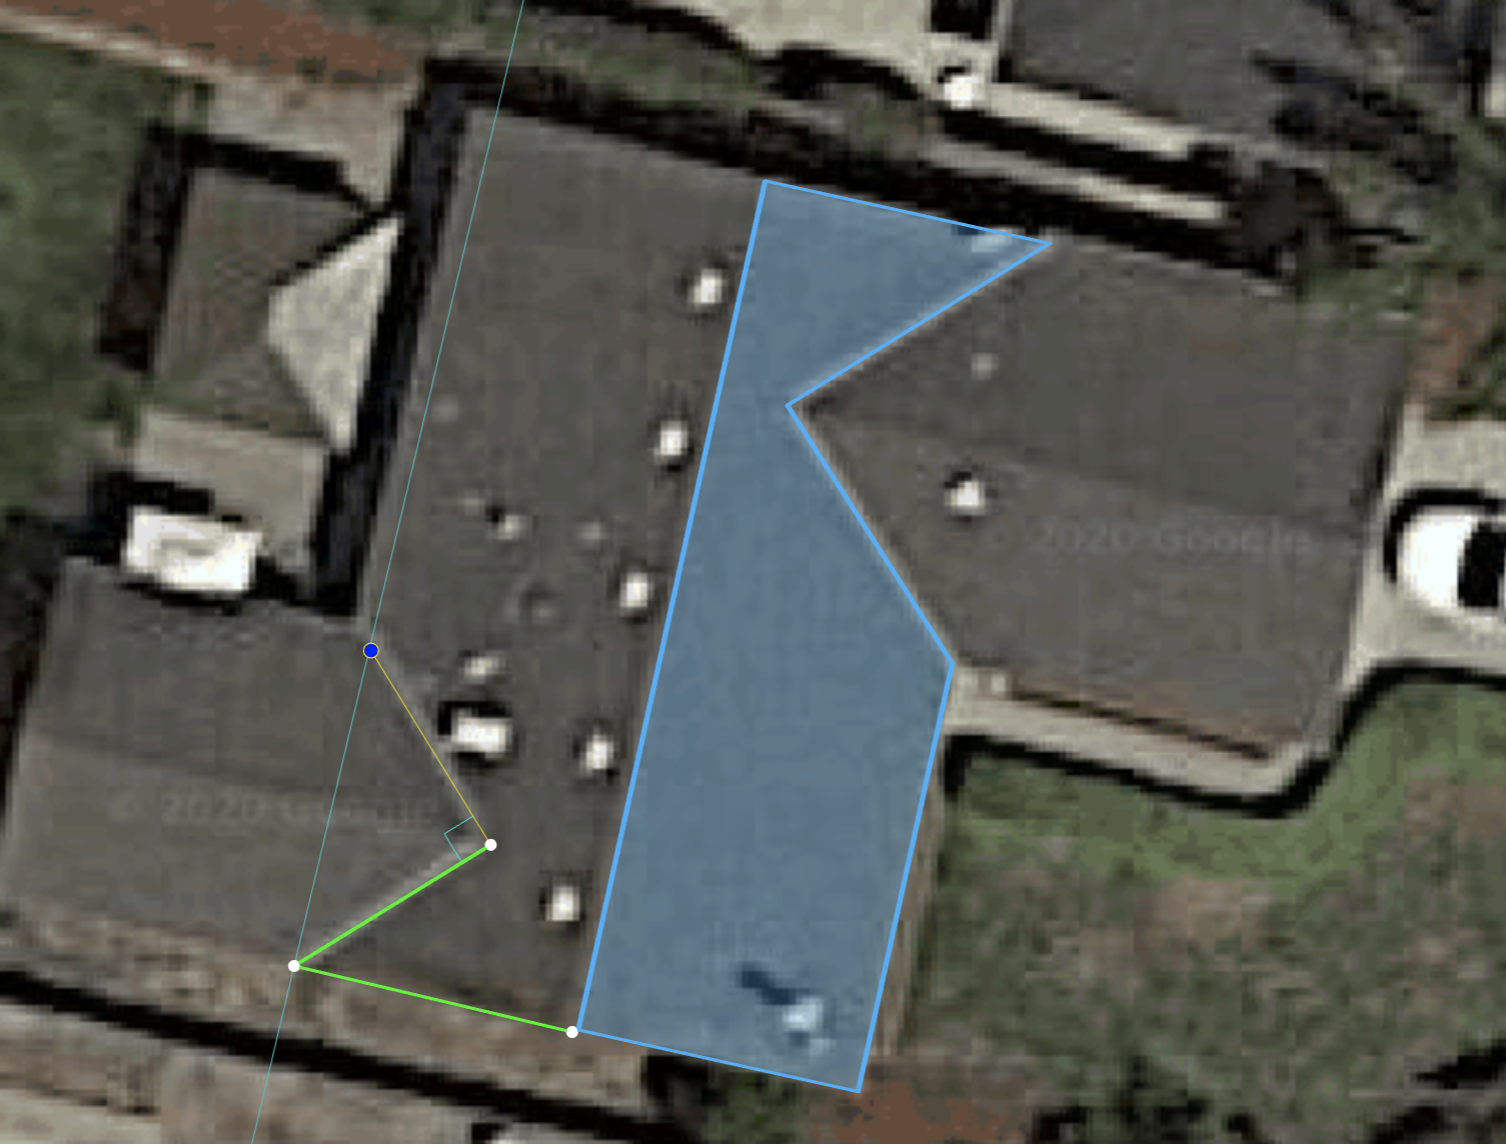
The Perpendicular Alignment Smart Guide can help make a 90° angle between two connected lines. In the following example notice that the eave begins 90° from the rake and our Smart Guide (faint blue line) is suggesting placement.
Angle Snap

Hotkey: A
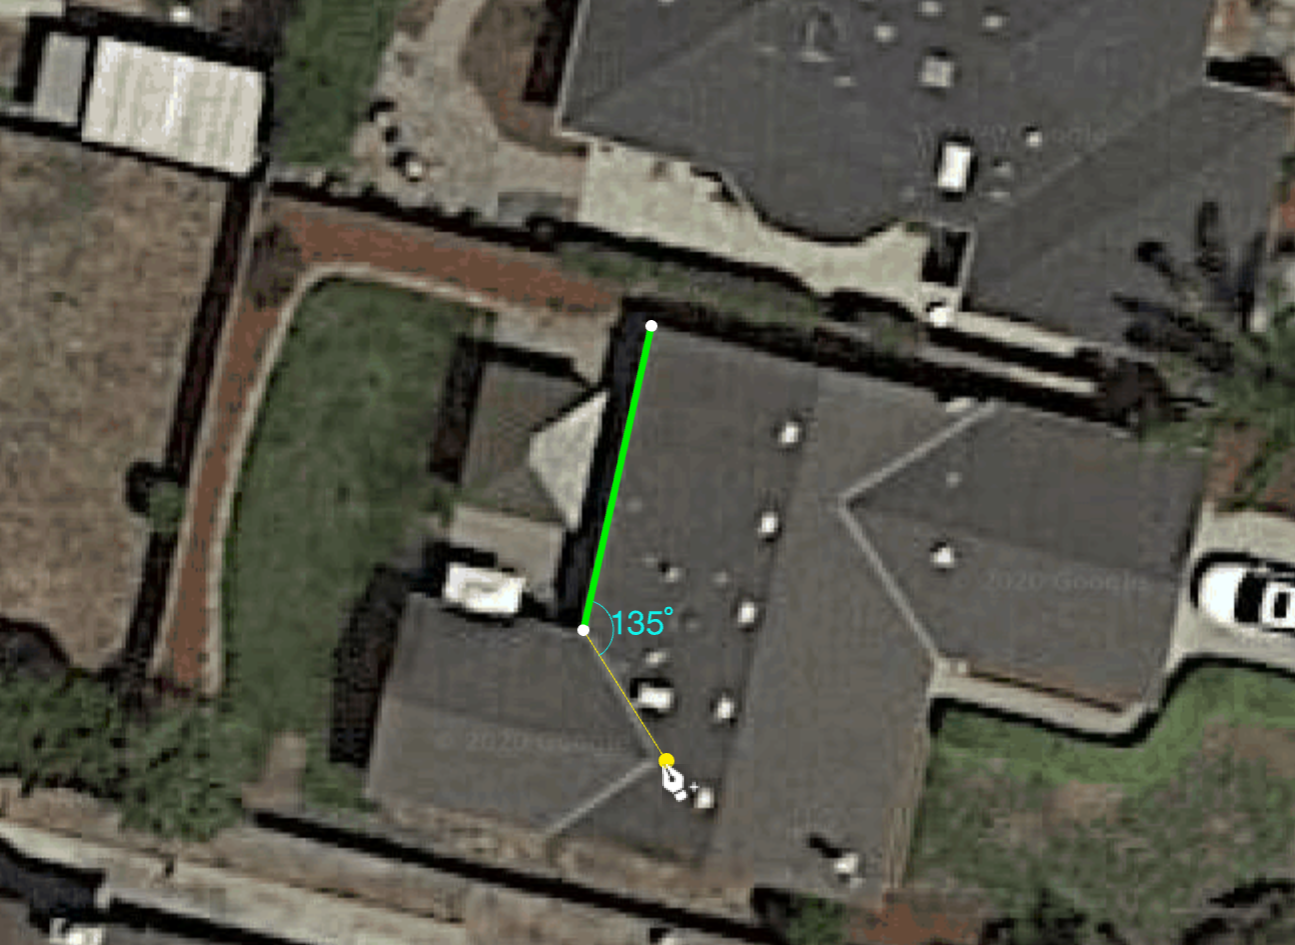
Angle Snap will display the angle between two lines and snap to commonly used angles. In the following example the suggested angle is auto-snapping to a 135 degree angle.
Point & Line Snap

Hotkey: L
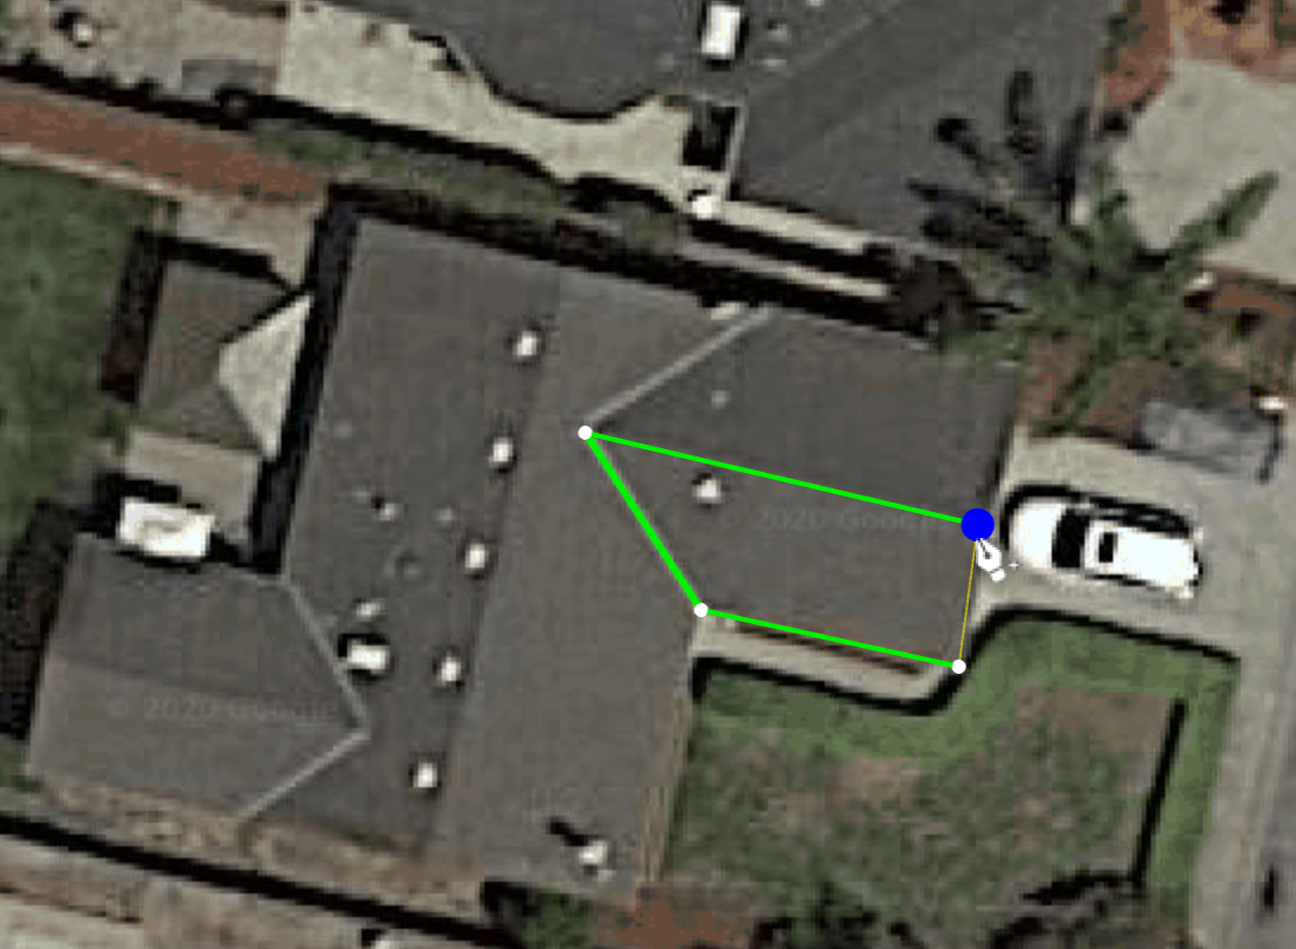
Point & Line Snap allows the ability to connect to a previously drawn point with the current tracing. For example if completing the tracing, the tracing will be brought to the first point traced. It’ll also snap to existing lines, such as when tracing a roof face within a previously drawn roof outline. In this example we’re completing the tracing by sharing the original point.
Suggested Smart Guides
Depending on what kind of roof shape you're tracing, it's best to mix and match, but in general, some good defaults include: Smart Squaring (S key), Angle Snap (A key), and Point & Line Snap (L).
Next Steps
With these skills, proceed to the Roof Outline step, although, this step is unnecessary for Sale Proposals. If generating a Sales Proposal, skip ahead to the Roof Tracing step.
