How to trace, edit, and delete parcel boundaries in-app, as well as, where these are shown in the final permit package.
Parcel Boundaries represent the boundaries of a piece of land or an individual property. They are sometimes required on the Site Plan of a permit package. You can now define these boundaries in-app and they will be shown in the permit package.
What you need to know about Parcel Boundaries in Lyra:
-
Parcel Boundaries are added automatically when a project is created.
-
Parcel Boundaries are received from a third party database and that can sometimes differ from Google imagery. This can be fixed by following the steps explained in this article.
-
Parcel Boundaries can be edited, deleted, and retraced in-app. We'll explain how to do each in this article.
-
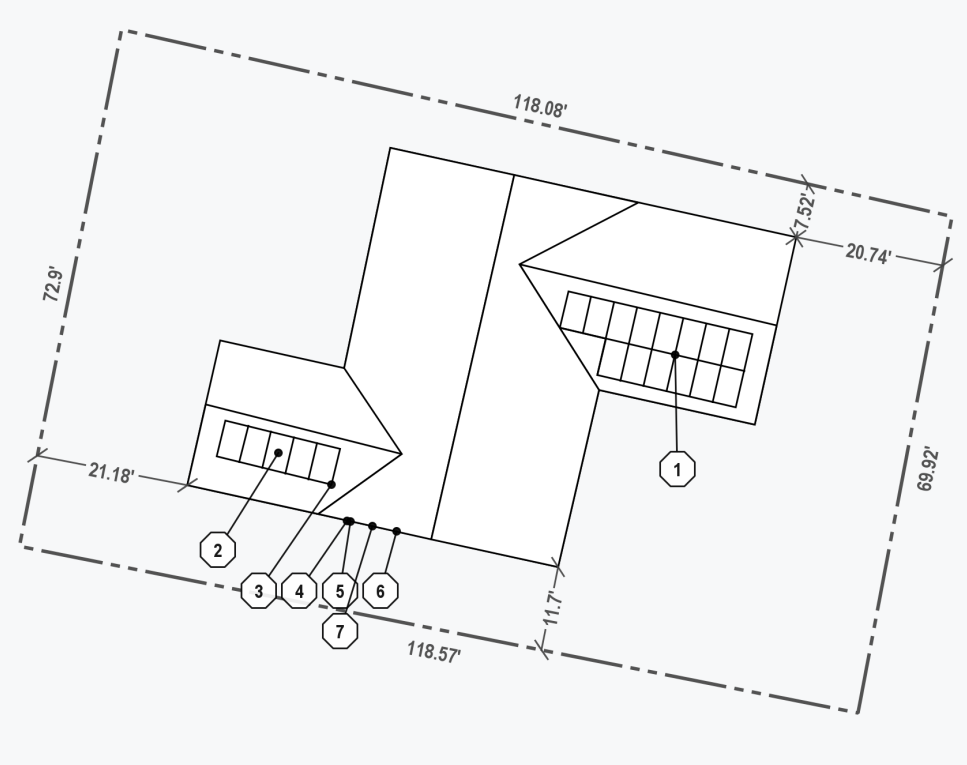
Parcel boundaries are shown on the Parcel Map (PV-1) and the Site Plan (PV-2). There are examples at the bottom of this article.
How to edit Parcel Boundaries
-
Select the Draw Parcel Boundary Tool from the Toolbar. It is located beneath the Panning Tool and above the roof definition methods.
-
Turn off any enabled Smart Guides. Angle Snap and Line snap are typically on by default. Open the dropdown menu at the top of the page in the center and click on any Smart Guides with a blue boundary around them. Alternatively you can use the corresponding hotkeys.
-
Select the Parcel Boundary point you'd like to adjust and drag it into place. Repeat this step with any other points until the boundary is as you'd like.
How to delete parcel boundaries
-
Select the Draw Parcel Boundary Tool from the Toolbar. It is located beneath the Panning Tool and above the roof definition methods.
-
Use the Backspace key on your keyboard.
-
Confirm that you want to delete the Parcel Boundary.
How to trace Parcel Boundaries from scratch
-
Select the Draw Parcel Boundary Tool from the Toolbar. It is located beneath the Panning Tool and above the roof definition methods.
-
Begin tracing with a single click. If the outline or roof(s) have been traced, you can enable smart guides to make a better tracing that matches their planes. In this example, the designer has already traced the structure and two roofs. They're using the Parallel Lines Smart Guide to match the tracing.
-
Continue tracing until reaching the original point. Ensure that the Line Snap Smart Guide is enabled and place the final point on top of the original.
Viola! You've completed the parcel boundary definition.
Note - in the above examples the parcel boundary is a solid line to make it more visible for the sake of example. On your projects it will be a dashed line.
Where are Parcel Boundaries shown in the permit package?
Parcel Boundaries are shown in two places:
-
The Parcel map found on PV-1
-
The Site Plan found on PV-2
Note - this example includes the optional Show Parcel Boundary Distance Lines feature that is enabled in the Advanced Settings. To learn more, go to the Advanced Settings article and read the section on the Site Plan.


